All 3rd, 4th, and 5th grade students are invited to participate in the Stone Lakes Elementary’s Science Fair. If you would like to participate in this year’s Science Fair please follow the timeline below:
- 4/15 Submit topic approval form to teacher.
- 5/12 All project display boards are due today.
- 5/12 Science Fair Night from 6-8pm
Helpful Links:
- 2016 Stone Lakes Science Fair Manual
- 2016 Science Fair Sample Scoring Rubric
- SCIENCE FAIR PROJECT IDEAS
Mr. Dolfi is allowing 4th graders to submit just a properly prepared display board. But, if you are interested in ‘winning’ the science fair, might I suggest that you check out our “Science Journal” page by clicking the link below.
- Science Journal (click here for details)
Although students are not required to turn in an “Official” Science Fair Notebook, the example below can be used and modified to serve as a template for printing out the items needed for the Display Board.
![]()
STEP 1:
Choose a Science Fair Topic:
One of the most important things to do when picking a topic for your science fair project is to focus on ideas that you think are really interesting. You’ll be spending a lot of time on it, so you don’t want your science fair project to be about something that is boring. My advice: pick something that is fun, inexpensive, and can be completed in a timely manner.
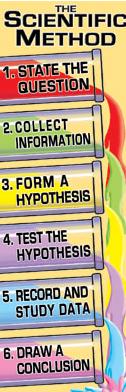
An experiment based project is a test under controlled conditions to obtain results. A “Science Fair Project” is not just writing a report or creating a model. Your idea must follow the steps of the “Scientific Method”.
Online Resources:
- SCIENCE FAIR PROJECT IDEAS
- Topic Wizard
- Science Fair Ideas
- Science Fair Projects
- Air and Water Chemistry for Kids (thanks Juliet)
![]()
STEP 2:
Write Your Question:
Once you have chosen your topic you need to formulate a scientifically testable question. Remember, your science fair project question should involve factors or traits that can be easily measured using a number. (You want results you can graph.)
Online Resources:
![]()
STEP 3:
Writing Your Hypothesis
- A hypothesis is sometimes described as an educated guess. That’s not the same thing as a guess and not really a good description of a hypothesis either. A hypothesis is a tentative explanation for an observation, phenomenon, or scientific problem that can be tested by further investigation.
- Most of the time a hypothesis is written like this: “If __[I do this] __, then __[this]___ will happen, because_____.” (Fill in the blanks with the appropriate information from your own experiment.) The “IF” part of your hypothesis should included the variables you plan to use in your experiment.
- Your hypothesis should be something that you can actually test. You need to be able to measure both “what you did” and “what happened.”
Example:
“If I plant 2 tomato plants and I give one of them fertilizer & water and the second plant only gets water, then the plant that receives both fertilizer and water will grow to be bigger because the fertilizer contains nitrogen, phosphorus, and potassium which helps plants grow.”
Online Resources:
![]()
STEP 4:
Writing Your Research/Background Information and Bibliography
Background research is important to help you understand the theory behind your experiment. In other words, science fair judges like to see that you understand why your experiment turned out the way it did. You should do library and/or Internet research so you can properly hypothesize the outcome of your experiment. With this background information (whether your hypothesis turns out to be right or wrong) you will be able to better understand and communicate what caused the results you observed.
Your research/background information should include the following:
- The reason or purpose for choosing your experiment
- Identification and explanation of the science behind your project (states of matter, weathering, chemical change…)
- A brief summary of what you learned and how the research impacts your project
Online Resources:
Citation of References/Bibliography
You should use and identify at least 2-3 sources to research your project.
Online Resources:
![]()
STEP 5:
Materials List
Create an organized list of all the materials and equipment you will use during your experiment. Be sure to include exact quantities and measurements. Please be sure to use the metric system when giving quantities and measurements.
Online Resources:
![]()
STEP 6:
Variables
Scientists use experiments to search for cause and effect relationships in nature. In other words, they design an experiment so that changes to one item cause something else to vary in a predictable way. Let’s say your science fair project was based on the question… “Does the color of a light bulb affect the growth of grass seeds?” Then your variables would be…
- Test Variable (Independent Variable) is the one that is changed by the scientist. To insure a fair test, a good experiment has only one test variable. As the scientist changes the test variable, he or she observes what happens. In the example above, the test/independent variable would be the different colors of the light bulbs.
- Outcome Variable (Dependent Variable) This is the measurable response to the changing test variable (it’s the result). In our example the outcome/dependent variable is how much the grass seeds grow.
- Control Variable is the materials or procedure that remains constant, it does not change. The control lets you compare your results in the experiment. In our example, grass seed (planted at the same time, in the same type of container, in the same type of soil, in a controlled environment) would be your control.
Just remember that the test/independent is the “cause” and the outcome/dependent is the “effect”. The control is the group that doesn’t have any change, so you can compare
Online Resources:
Science Fair Project Variables Checklist
![]()
STEP 7:
Procedure:
Write the experimental procedure like a step-by-step recipe for your science experiment. A good procedure is so detailed and complete that it lets someone else duplicate your experiment exactly! Repeating a science experiment is an important step to verify that your results are consistent and not just an accident. For a typical experiment, you should plan to repeat it at least three times.
Online Resources:
![]()
STEP 8:
Conducting Your Experiment:
If you haven’t already, obtain a notebook to record all of your observations during your experiment. Before starting your experiment, prepare a data table so you can quickly write down your measurements as you observe them. Follow your experimental procedure exactly. If you need to make changes in the procedure (which often happens), write down the changes exactly as you made them. Be consistent, careful, and accurate when you take your measurements. Numerical measurements are best. Take pictures of your experiment for use on your display board if you can.
Your experiment should test whether your hypothesis is true or false. It is important for you to perform a fair and unbiased test. When conducting your test make sure you change only one factor at a time while keeping all other conditions the same.
Online Resources:
![]()
STEP 9:
Data Analysis & Results:
Take some time to carefully review all of the data you have collected from your experiment. Use charts and graphs to help you analyze the data and patterns. Did you get the results you had expected? What did you find out from your experiment? Really think about what you have discovered and use your data to help you explain why you think certain things happened. Then write a short summary to explain the data you collected.
When graphing your data, remember that the independent variable goes on the x-axis and the dependent variable goes on the y-axis.
Online Resources:
![]()
STEP 10:
Conclusion Statement: A conclusion is a statement that tells what an investigation showed, based on observations and data.
- Based on your research, write a statement to answer the purpose question.
- Write a statement to indicate whether or not the data supported the hypothesis.
- Provide the actual data (a written summary of the data you collected).
- Identify what may have gone wrong or what could be done next time to improve the experiment.
Online Resources:
![]()
STEP 11:
Recommendation
Write a paragraph or two offering advice to scientists who may be interested in your project. Make recommendations that directly related to your experiment and what you would do differently if given the opportunity. You may discuss ideas for a redesign, propose new questions for other investigations, or suggest an application in industry for the knowledge you gained while conducting your experiment.
![]()
STEP 12:
Communicate Ideas:
Organize your Science Fair Notebook and then create a neat and eye-catching display that showcases your work. Include information about all the stages of your investigation – your research, plan, hypothesis, procedure, results, conclusion, report, and charts. Include pictures and drawings if you have them.
Online Resources:
![]()
ADDITIONAL LINKS THAT MAY BE HELPFUL:
Science Fair YouTube Video Link
![]()
![]()

![]()